
Because Suffusion already have it’s own implementation of mega-menus I never thought to use UberMenu. But on the Suffusion support forum was asked this question – how can be used together?
Today I had the possibility to test the plugin. Wow. Very impressive. A lot of options, a lot of styles, very well documented and finally a great look. Congratulations to authors, great job indeed!
And this tool is really easy to use with Suffusion. In part because of Sayontan who’s provided the hooks for this, in part because of the Easy Integration module provided in plugin.
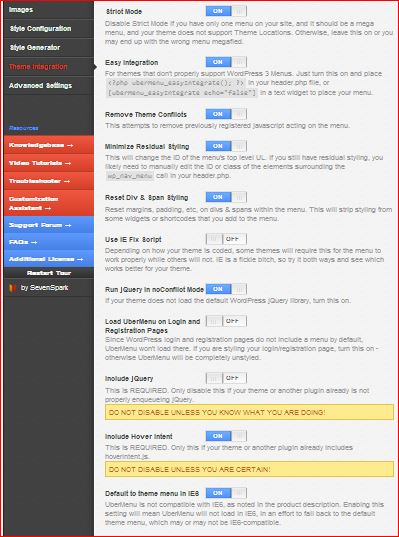 STEP 1. Buy, download, install and activate the UberMenu plugin. Then quickly go at Appearance -> UberMenu -> Theme Integration and set the options to “ON” like in image:
STEP 2. Immediately we can observe under Easy Integration option a phrase:
For themes that don’t properly support WordPress 3 Menus. Just turn this on and place uberMenu_easyIntegrate(); ?> in your header.php file, or [uberMenu_easyIntegrate echo="false"] in a text widget to place your menu.
So, at the first sight – easily we can use the shortcode in a text widget and we will have the menu. With this idea we will go straight to:
A. First approach – go to Appearance -> Widgets and add a text widget in any widget area you wish. As the content of text widget use:
|
1 |
[uberMenu_easyIntegrate echo="false"] |
Suitable for horizontal menus are the Widget Area Above (or Below) Header or Widget Area Above Footer, but I can see usages in Header Widget Area or into the small areas from the left and right of navigation bars (which can be enlarged with simple custom styles).
Because UberMenu allow vertical menus, this can be used in widget areas from sidebars.
You’re set, your uber-menu will appear in the selected widget area. If you use the horizontal Uber-Menu can go at Suffusion Options -> Other Graphical Elements -> Navigation Bar Below (and Above) Header and set it to hidden.
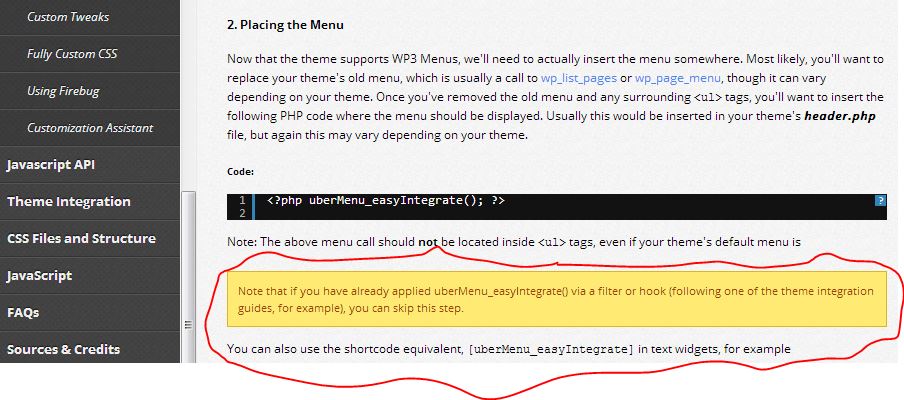
B. The second way Very easy again, this approach results from the plugin documentation:

In fact Suffusion has added 2 filters which can be used for integration of Uber Menu. So, in your functions.php (recommended in a child theme) can add:
|
1 2 3 4 5 |
function nav_uber(){ uberMenu_easyIntegrate(); return false; } add_filter( 'suffusion_can_display_top_navigation', 'nav_uber' ); |
OR (don’t add both codes, because you can add only one Uber Menu):
|
1 2 3 4 5 |
function nav_uber(){ uberMenu_easyIntegrate(); return false; } add_filter( 'suffusion_can_display_main_navigation', 'nav_uber' ); |
The first code will replace Navigation Bar Above Header with Uber Menu, use the second code for placing the Uber Menu instead of Navigation Bar Below Header. (the reference for both hooks was added in the documentation provided with the new versions of UberMenu)
Because that’s it – you don’t need to edit any other file, you don’t need to add any other code in header.php or somewhere else – you just did that by adding one of the codes above in functions.php – you just use a filter to positioning the Uber Menu instead of one of Suffusion navigation bars.
 STEP 3. The Uber Menu is already integrated in Suffusion. You need to go at Appearance -> Menus, create your stunning menu and assign it to the new location “UberMenu”.
Don’t forget to give to menu the same width as for your site at Appearance -> Ubermenu -> Advanced Settings -> Menu Bar Width and center the menu below at Center Menu Bar + Enable Clearfix. This is needed because once you enable theme compatibility, the menus of Suffusion are completely disabled, the settings from Other Graphical Elements aren’t applied anymore for transformed navigation bar. (While you are there enable also HTML5 markup as the theme already is based on this specification).
From here is nothing different by any other theme – set the plugin as you wish and set the menus as you like.
