Well, there are a lot of applications which need a Google API key. As an example the excellent FontMeister Plugin for WordPress, written by Sayontan Sinha ask for an API key in
Continue reading...Few days ago I was asked again how to create a Google API key for Fontmeister plugin. The person who’s ask sustain that he follow the steps from my previous article about Google API Keys in Old Developer Console, but Fontmeister don’t show the fonts. I check a site where fonts used to work with my key and I saw that I also loose the list of fonts. So I go to https://code.google.com/apis/console to see whats’s happens and Google prompted me with this:
Because I never was disappointed by Google improvements, I immediately follow the invitation and I found a much better interface, very clean and functional. But the screens are changed completely compared with the old console.
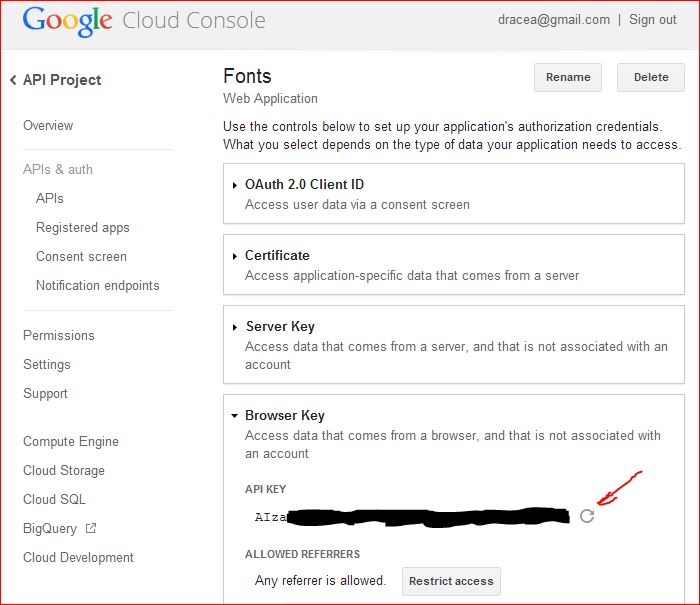
If you arrived here because your API Key stopped to work, I solved the problem by simply regenerating the key, then used the new key in Fontmeister setting.
For creating the API key in the new Cloud Console follow these steps:
Step 1. Go to https://cloud.google.com/console. Will be prompted to login into your Google account (make one if you come late to the party).
Step 2. If you are for the first time on Google Developers Console will have to create a new project, so click on the big red CREATE PROJECT button:

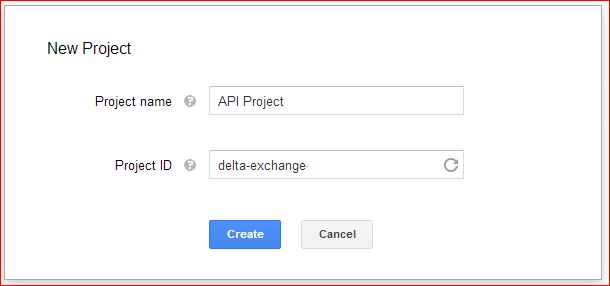
In the create project popup add a name for your project in the first field (can let the second field unchanged, is automatically generated by Google) and save (click on Create ).
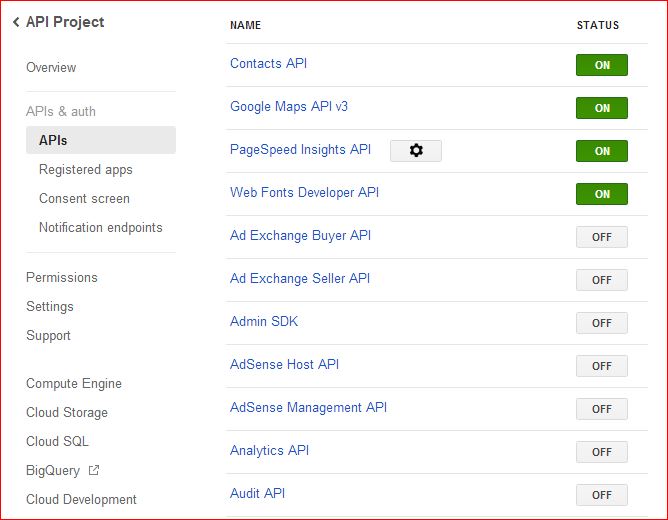
Step 3. Now will see the name of your project in a list, click on that name. On the menu from the left side click on “APIs & auth”:

Will see the list of applications. Click on OFF buttons for make them ON for desired applications.
This article was published yesterday morning (Dec. 18, 2013 @ 6:07 AM). Today, early in the morning I saw that Google already changed the console (which was renamed back as Goggle Developers Console), so the next steps are these:
Step 4. On the left side menu click on Credentials, then on CREATE NEW KEY below Public API Access.
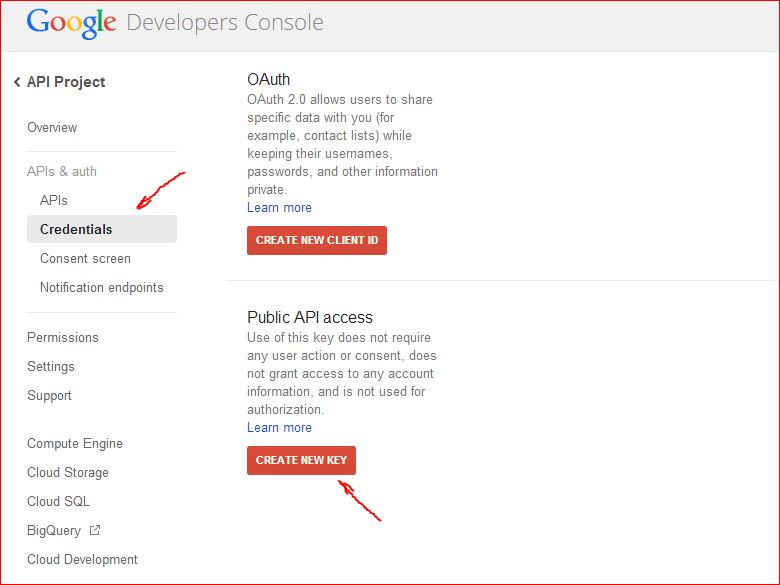
Step 5. In the opened popup click on Browser Key .
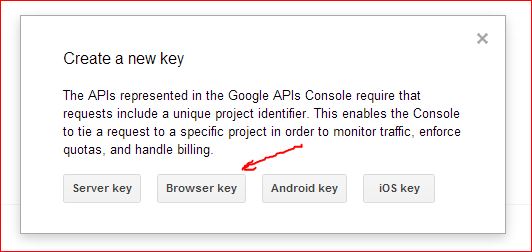
Step 6. In the next popup don’t write anything in the blank edit area, but only click on Create button.
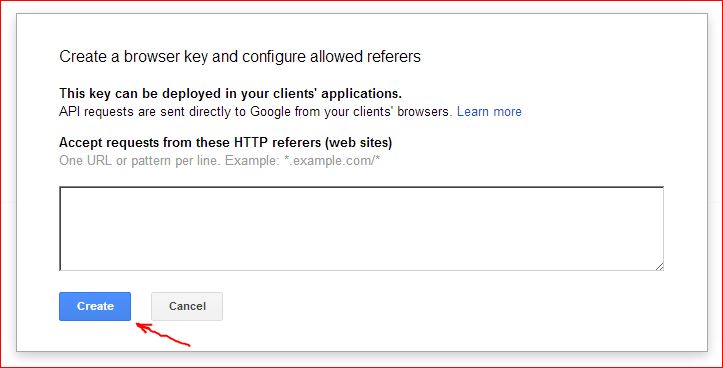
THE END. After clicking on Create button in the step above, your key is created and displayed on the right side:

The steps below are obsolete now.
Step 4. On the left side menu click on Registered apps. Click on REGISTER APP button from top of the screen then input a desired name for your application. Select Platform as Web Application and save (click on Register )
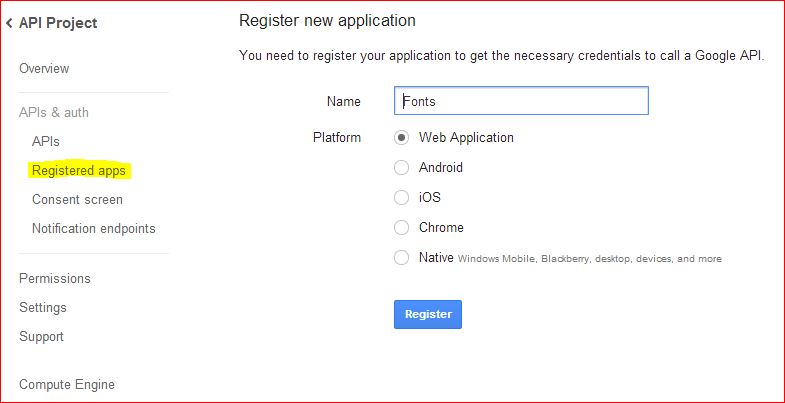
Step 5. We are at the end of the journey. After clicking REGISTER in the previous step, automatically is opened a screen for setting up the application’s authorization credentials. By clicking on the last tab from this screen (Browser Key) will see the desired API key. (The circular arrow from the right side of the key is the new “Replace Key” button).
